Passive Income

At one time or another, we have all that of starting our own business. But many of us can be doomed before we even begin because we’re envisioning the wrong type of business. When most people think about starting a business, we think about the “services industry,” such as legal, medical, financial, marketing, etc.—you provide a service and people pay you. It’s simple and, upfront, it’s easy, makes sense, doesn’t cost a lot to get off the ground and doesn’t require you to commit to an idea—you just have to decide on the service. But the issue with that approach is that it is labor intensive, extremely labor intensive.
Enter passive income. Our friends at the IRS define passive income as “only coming from two sources: rental activity or ‘trade or business activities in which you do not materially participate.’”
What does it mean to not materially participate? Basically, it means you’re not actively participating in generating that income on a daily basis. This is very obvious when it comes to rental activity. You make the upfront investment of purchasing the house and then you rent it and you get a stream of consistent income. The same can happen with a business.
Now let me be clear: passive income is not easy income. But it is flexible income, which is really the point. You invest your time and energy getting your business off the ground and then you let it do the work, while you spend your time on all of the other things that life has to offer.
And that is the reason I love the passive income concept so much. I believe there is more to life than living in a cubicle. People work harder and longer when they’re motivated and passionate and people are most motivated and passionate when they’re working for themselves. Instead of punching in and staring at the clock filling each day with empty minutes, they’re choosing to spend their time, which is the most empowering thing anyone can do.
Speaking of power: the internet is a powerful thing. It connects people and services and industries in ways that perhaps no one outside of Al Gore could have envisioned. (See what I did there?) With the internet, there are no borders and that presents an incredible opportunity for retailers. Potential customers are literally everywhere. The best part, for you, is that there is incredible room for growth and to better service customers. Take this study that details how more than 67-percent of consumers shop internationally online, but that just one in five shoppers say the experience exceeds expectations. That presents an opportunity for you to improve upon that experience.
While this approach does require more upfront planning and effort, you can get your passive income website up and running this weekend, and you can start making money immediately. And you are not going to do it alone, per se, as the world of ecommerce has a countless array of tools and services to help you be successful.
So if a passive income business sounds like something you’d be interested in, I’ll make it easy for you and provide a step-by-step guide into how to set one up this weekend. So let’s get started!
Step #1: You need a website
This is obvious right, but a lot of people just do not know where to start when it comes to creating a website. They assume it is overwhelming, costly and too technical. But that’s not true. At least, it’s not true any more. You do not need design experience to get this up and running. There are any number of providers now that allow you to develop and customize your own website typically through a variety of different templates. You can do this.
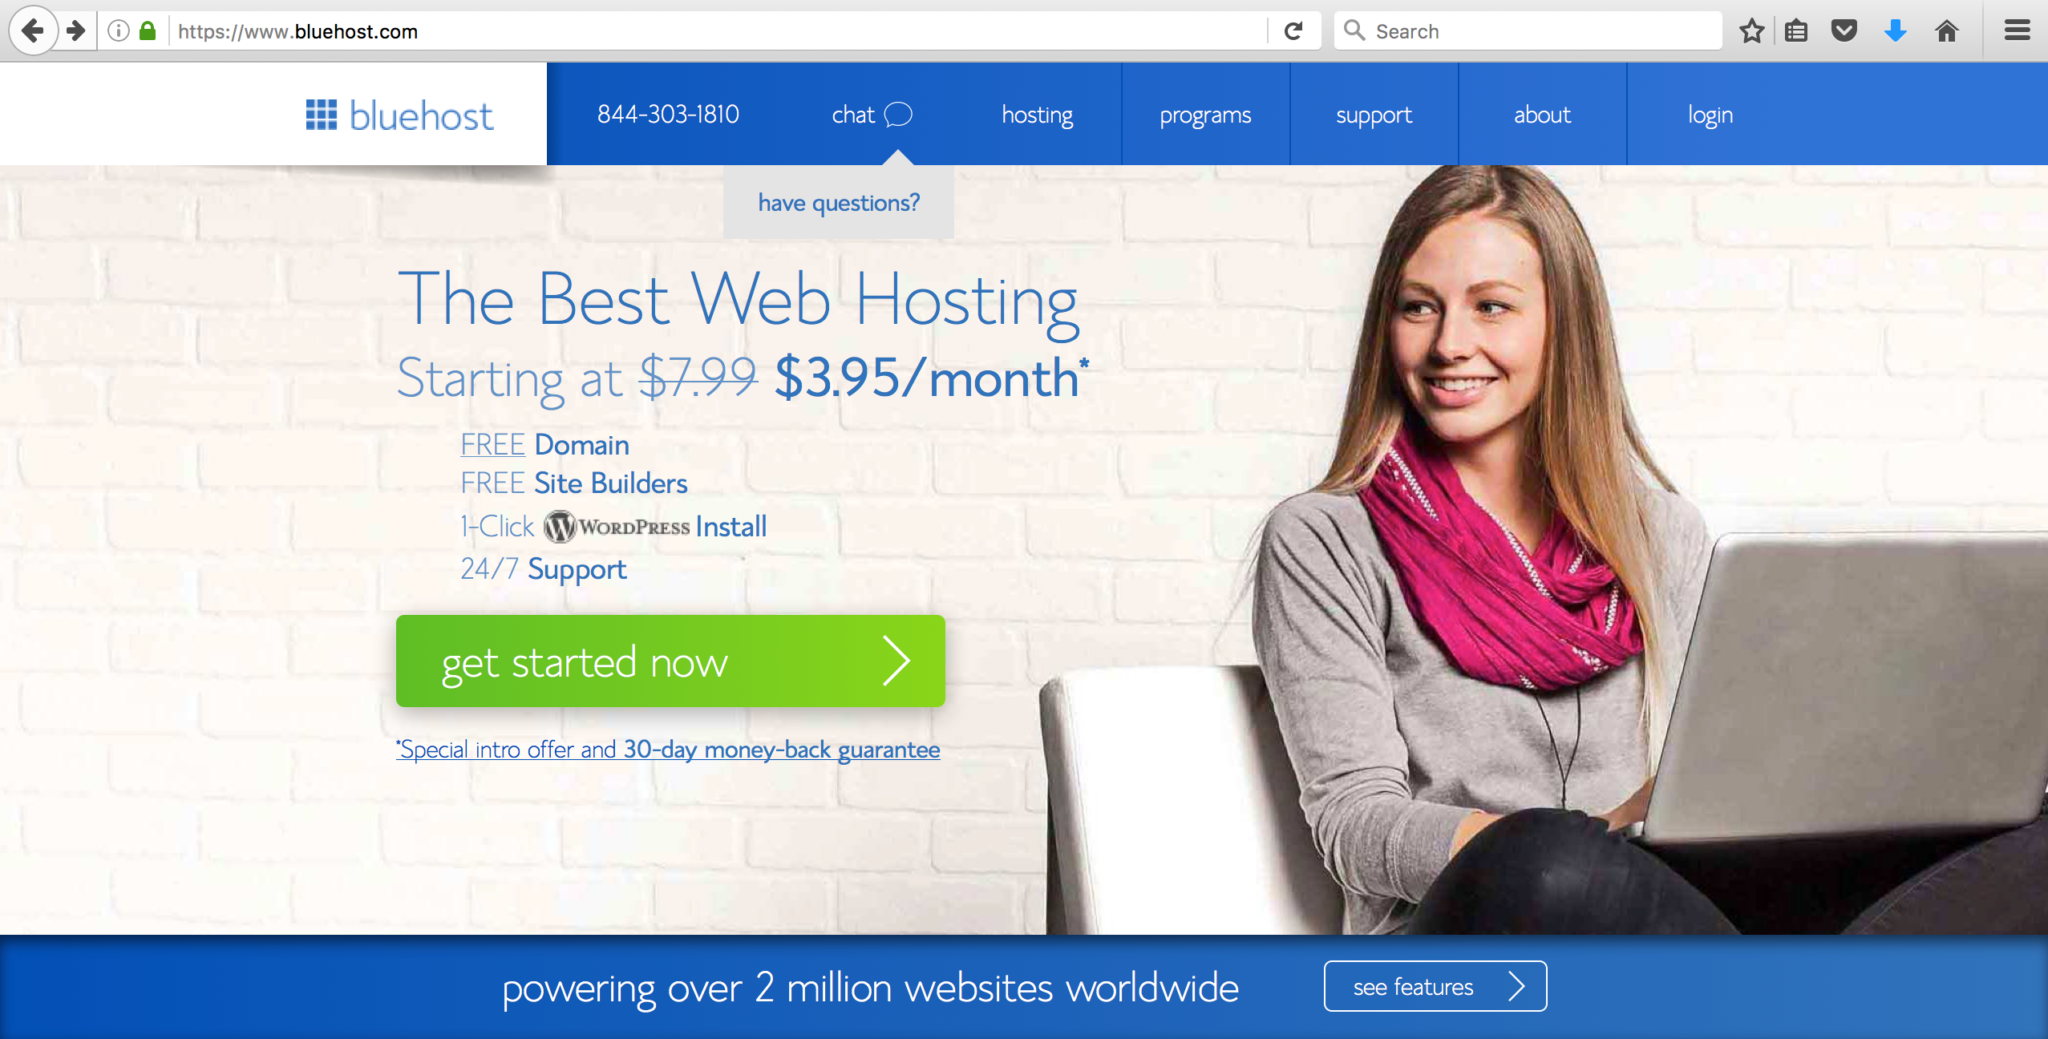
Take BlueHost, best known for its simple, intuitive and secure web hosting, which comes with plenty of features for customization. With BlueHost, which powers more than 2 million websites across the globe with prices starting at less than $3 per month, you can have your website up and running in no time. While BlueHost is straightforward, it offers 24/7 support should you have any questions along the way—that’s a particularly nice feature, especially if this is your first time trying to establish a website aimed at making money.
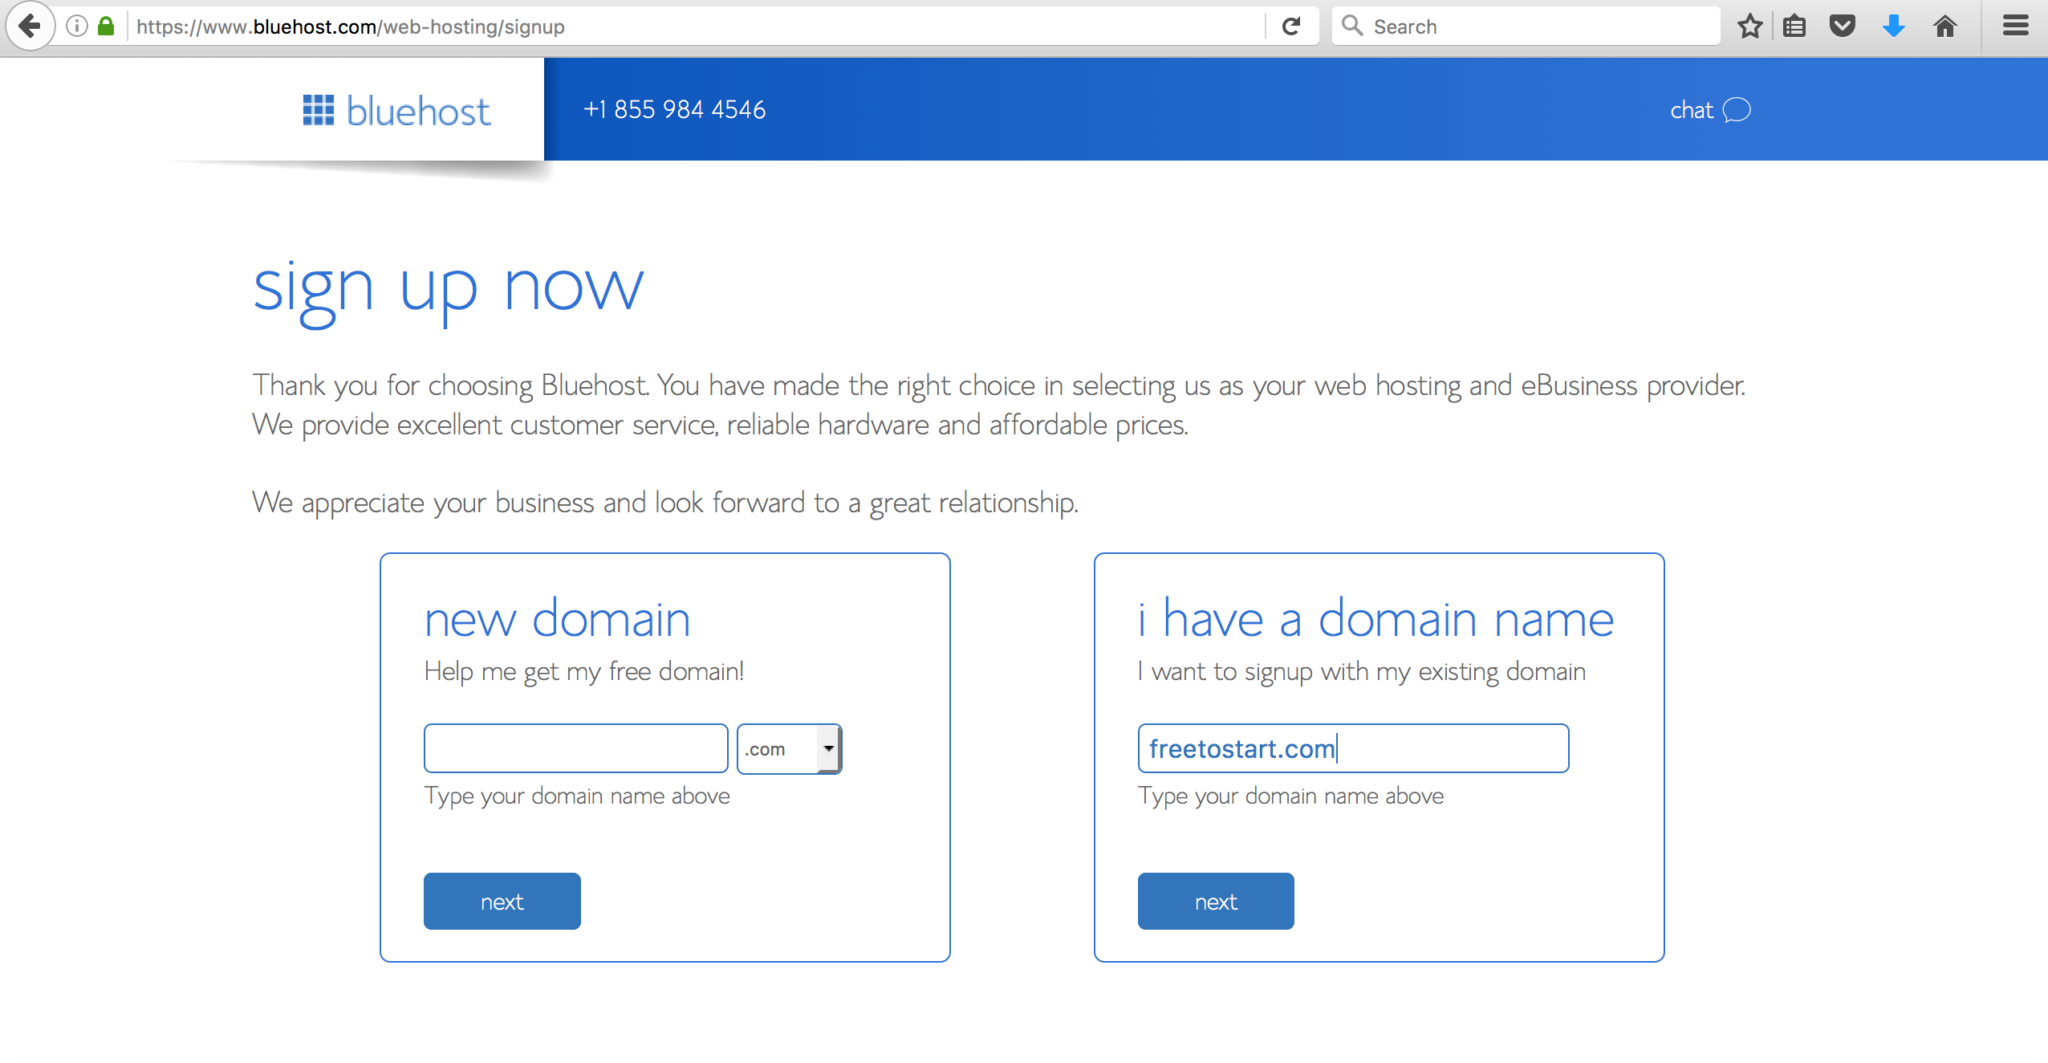
Setting up an account is incredibly easy. First visit www.bluehost.com.
Then choose the service you want to have. You’ll notice this is not a huge upfront investment. The internet has really torn down many of the barriers of entry to starting a new business.

Next you’ll need to enter a domain name. This should essentially be the name of your business. A good business name should do several things:
- Be memorable
- Quickly identify your product
- Have an available website
Take your time here. Don’t rush. Find a name that is memorable, reflects what your business has to offer and is also available.
Once you’ve decided on a domain name, you are then going to be asked to enter some account information.
At this stage it is important to point out that the $3.95 rate is for 36 months. While that is a steal of a deal, you may want to choose 12 months at a slightly higher monthly rate until you know you want to commit to your project. Starting an online passive income business is not expensive. But it does cost money and is an investment. You’ll be surprised how little things add up. Make sure you’re tracking your expenses, so you remain in control of your business. Remember, the goal of any business is to make more money than you spend.
Enter your payment information and then click “submit” and you’re then the proud owner of a Blue Host account.
For artists or craftspeople, consider setting up a storefront on Etsy.com. Again, getting established is easy and intuitive. If you are a craftsperson, with Etsy, you are setting up shop right in front of an engaged and interested audience. You still need to stand out, of course, but you already know your customers.
Step #2 – What’s for sale?
OK, so you have your website up and running. That’s great. But, naturally, people need to be able to buy something on your website. That’s where an online ecommerce platform comes in. This is crucial. There are plenty of ecommerce platforms to consider and Shopify is at the top of most lists when it comes to ecommerce platforms—for good reason. Just like BlueHost, Shopify is simplistic and easy to use, even for beginners.
You can set up your platform instantly by selecting from Shopify’s base of “themes.” For most people who are just getting started, Shopify’s themes are perfectly suitable. For those with a coding background, you may want to customize Shopify templates even further. Once you’re up and running, you can easily add apps from Shopify’s app store as you expand, address needs and increase functionality.
Click here for a useful guide from Shopify on figuring out what to sell.
Step #3 – If you’re not growing, you’re shrinking
OK, so you have a website where people can purchase something. The next step is growing your website. People need to know about your site if you’re going to be successful. The best way to get the word out is through targeted email marketing. If you want your website to be successful, you will need to make some initial investment on simply getting the word out. You can have the best products in the world, but if no one knows about your website, who cares?
There are plenty of options for raising awareness for your website and making sure it gets in front of the right people. LeadPages is a great place to start. LeadPages helps you build a base of potential customers that you can market to directly. This tool will help you collect and grow email subscribers and it does so in a number of ways, from creating “opt-in” landing pages to hosting webinars to building your email lists through text messaging and more.
What is nice about ConvertKit is that it offers targeted automated email marketing solutions you can customize for your website, rather than a one-size-fits-all approach. It also helps you build a base of subscribers. Built especially for bloggers, ConvertKit has a variety of features you can tailor to your website and its system for automated emails is, frankly, pretty cool. The automation is based on a series of triggers so you can feel confident that you are connecting with your actual customers and your potential customers in meaningful ways.
Step #4 – You’re an expert now so act like one
Now that you have established a website, offered a product(s), and are raising awareness for your website, your next move is to show off. Seriously. You are an expert in your industry and that is fantastic news because customers want to buy from industry experts. Do not underestimate yourself and your successes.
Demonstrate your knowledge on your blog. Do you have a blog? You do now. By utilizing WordPress or another Content Management System (CMS), you can use your blog to detail your experiences and your expertise. What have you learned as an industry professional? What tips can you offer? What tools have you utilized? Blog posts don’t need to be terribly in-depth.
There is tremendous value to your customer base in your own experiences as an industry professional. A blog is an opportunity for you to educate your customer base directly. But perhaps most importantly, a blog is also a tool to generate traffic, especially if you’re taking the time to craft thoughtful posts. Your stories connect you with people and people that are interested in your stories often end up being interested in your products.
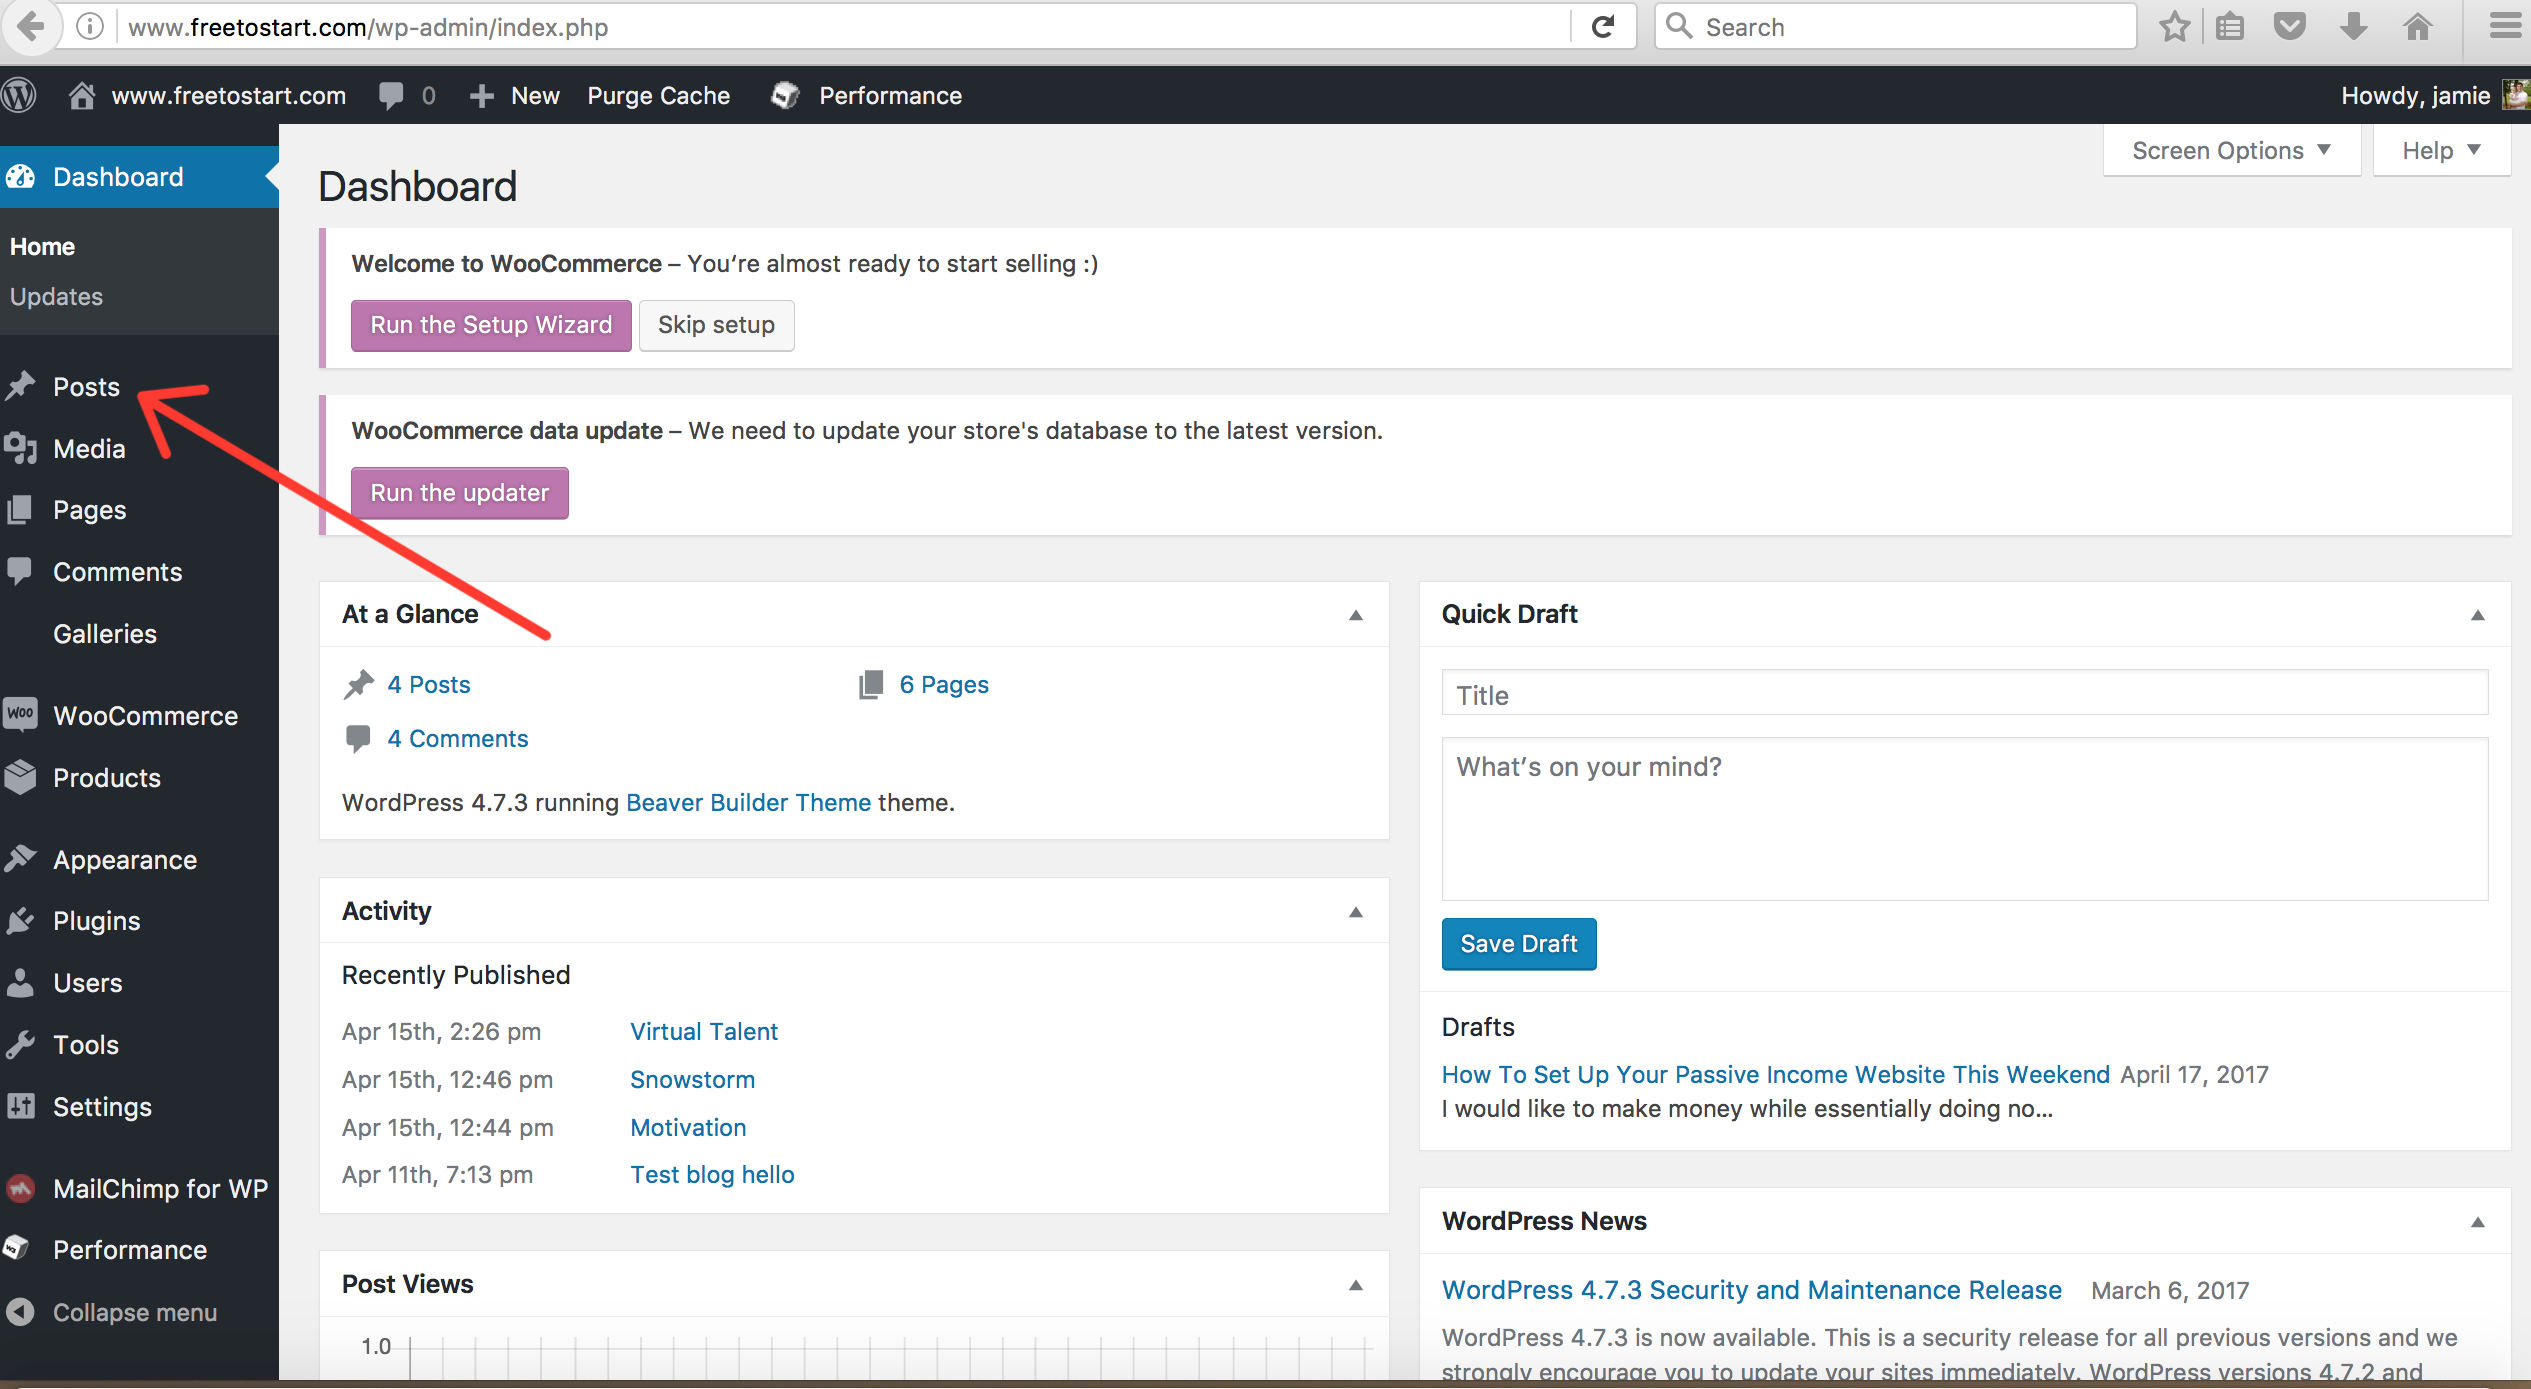
Once you sign up for WordPress and choose a template you can jump into creating your first post. Once you sign into your administrator portal, you’ll be in your home dashboard. From the dashboard you’ll want to click “posts”, as you can see in the below screen shot:
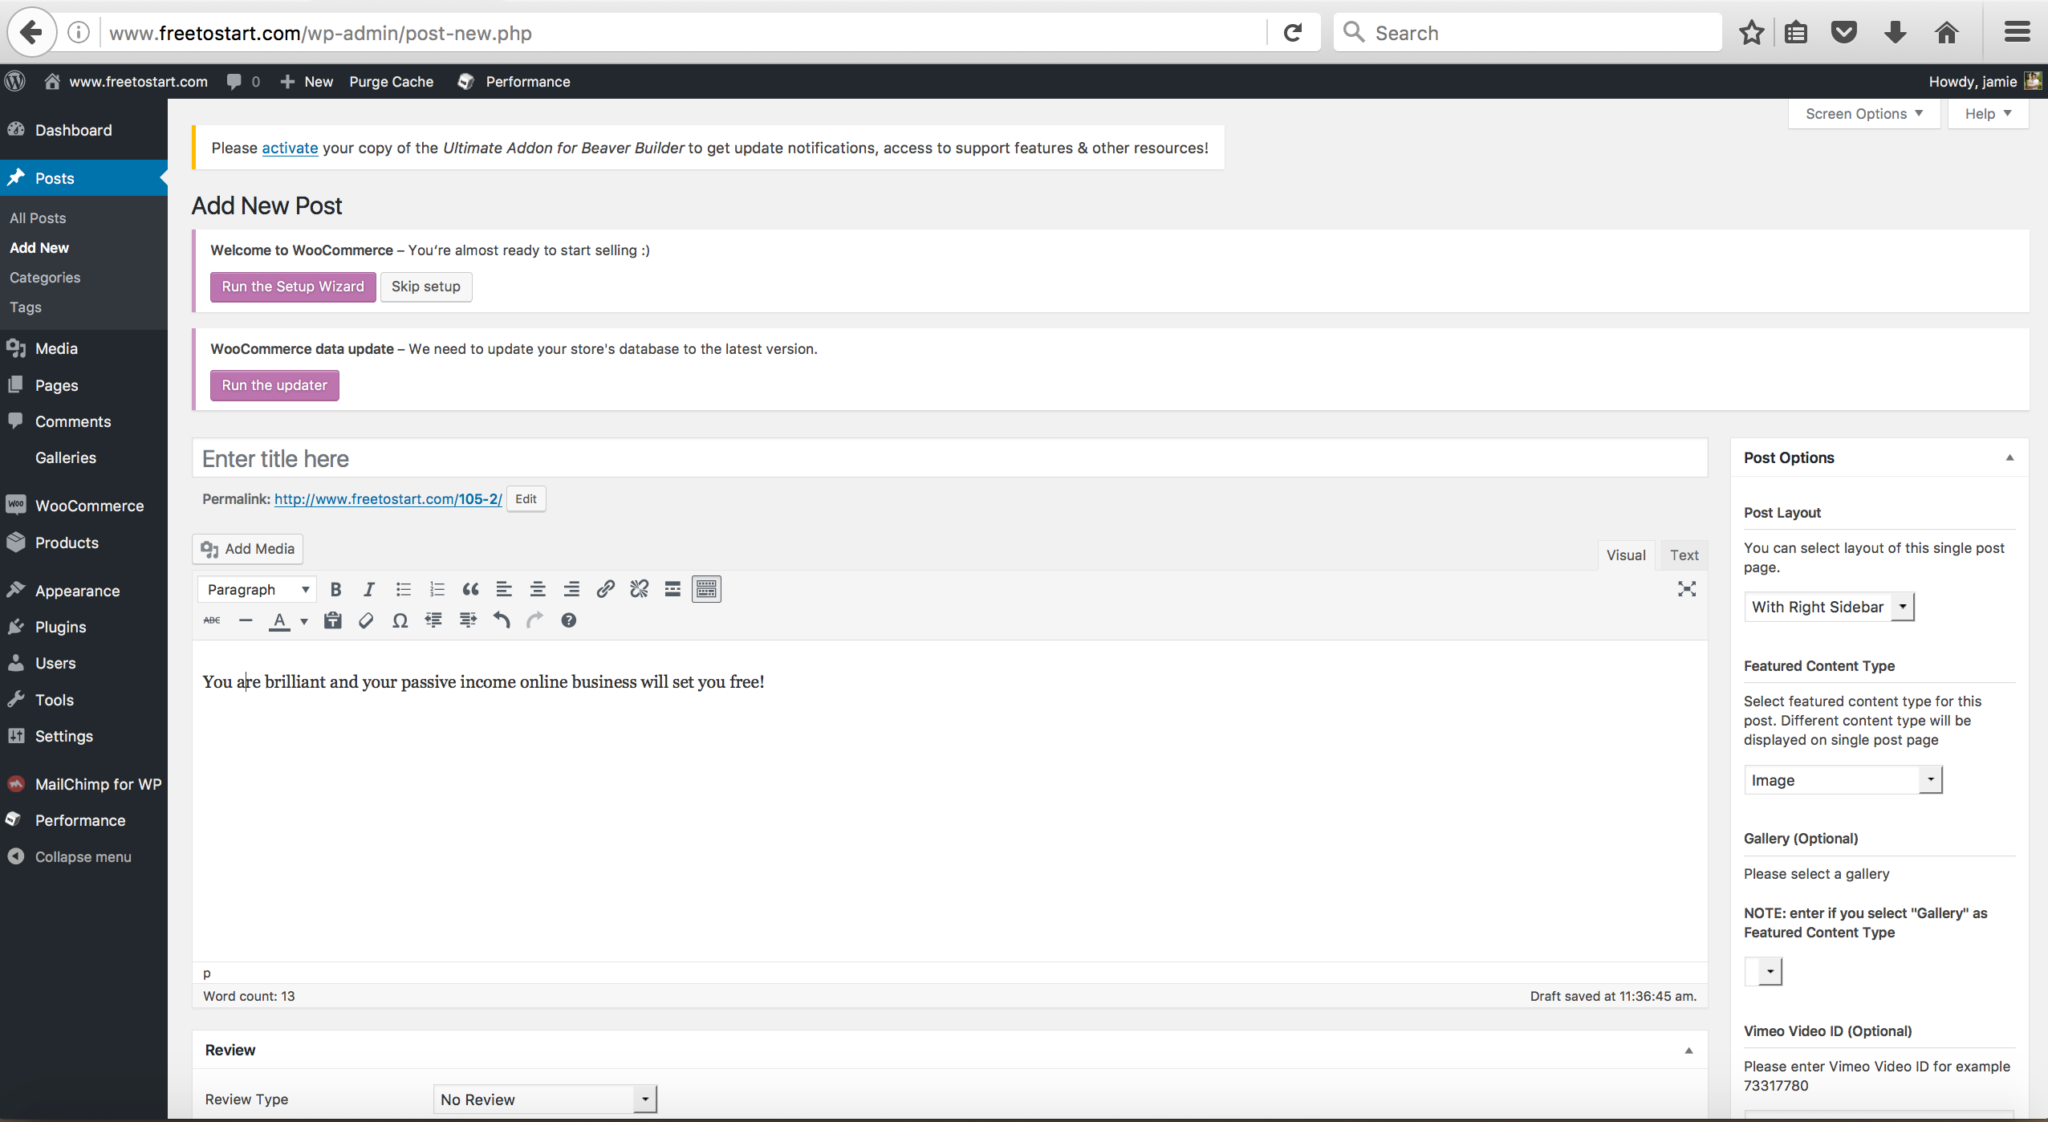
Once you click on post, you’ll want to add a new post:

Once inside a basic blog post is very straight-forward. You’ll want a catchy title and then you can add your content write into the box. Even you know basic HTML, you can write your post in “text” mode but if you have limited technical chops (like myself!) then you can simply create in “visual” mode. Once you start creating, the functionality is very similar to a Word document.
Once you’ve written your blog, be sure to follow Step #1, which is to save it. Save often. Once you’ve said, you can follow Step #2, which is to preview your post. This will open up a new window and show you how your blog will look live on your website. Lastly, once you’ve proof-read, found some great images (make sure you only publish your original images or images that fall into the public domain or creative commons), you can hit “publish.”

The world of passive income websites is evolving quickly but there are countless tools available to help you hit the ground running, tools that are specifically developed in a way that is simple, intuitive and secure. If you follow these steps and rely on these tools, there is no reason why you can’t get started in a weekend. Good luck.